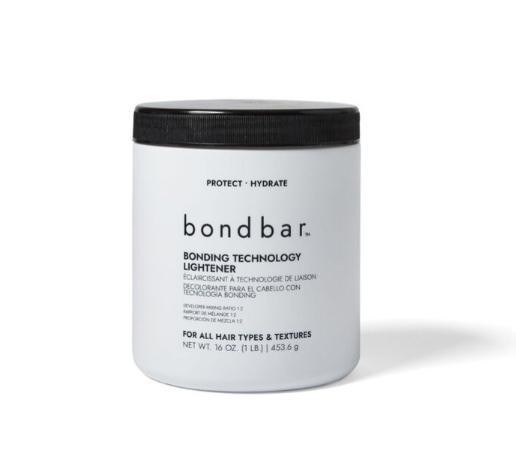
Bonding Technology Lightener Tub 16 oz
- Reduces damage and breakage compared to standard lightener
- Cruelty free*, Vegan, Phthalate free, and Paraben free
- Protects & hydrates hair bonds
- Maintains integrity of the hair
- For all hair types & textures
- Available in 1oz or 16oz
- *Finished product not tested on animals.
$25.99
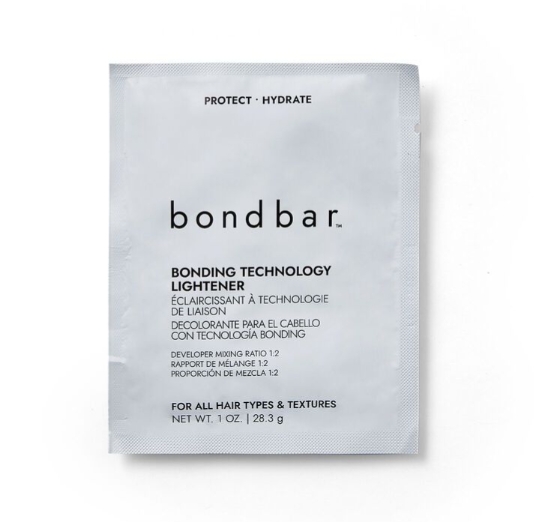
Bonding Technology Lightener Packet 1 oz
- Reduces damage and breakage compared to standard lightener
- Cruelty free*, Vegan, Phthalate free, and Paraben free
- Protects & hydrates hair bonds
- Maintains integrity of the hair
- For all hair types & textures
- Available in 1oz or 16oz
- *Finished product not tested on animals.
$6.29

Bonding Technology Lightener Highlighting Kit
- Kit includes: Two 1 oz. powder lightener packets, one 4 oz. 30v developer, one applicator brush, one pair of gloves, one highlighting cap, one needle, and one mixing tray
- Cruelty free*, Vegan, and Paraben free (*Finished product not tested on animals)
- Reduces damage and breakage compared to standard lightener
- Protects & hydrates hair bonds
- Maintains integrity of the hair
- For all hair types & textures
$22.89
As I sit here, running my fingers through my freshly lightened hair, I can’t help but reflect on my colorful journey through the world of DIY hair bleaching. After countless trials, errors, and a few emergency salon visits that cost more than my monthly grocery budget, I’ve finally found my holy grail: Bondbar Bleach.
If you’re considering taking the plunge into the world of at-home hair lightening, you’ve probably spent hours scrolling through endless product reviews and YouTube tutorials. Trust me, I’ve been there. The sheer volume of information can be overwhelming, and the fear of ending up with damaged, straw-like hair is real. Choosing the right bleach product is perhaps the most crucial decision you’ll make in your hair transformation journey, and that’s exactly why I’m writing this comprehensive guide on Bondbar Bleach.
What Exactly Is Bondbar Bleach and What Makes It Special?
When I first heard about Bondbar Bleach, I was skeptical. Another hair bleach claiming to be revolutionary? I’d heard it all before. But as I dug deeper, I realized this product deserved attention.
Bondbar Bleach is a professional-grade hair lightening powder that works by breaking down the melanin (color pigment) in your hair strands. But what sets it apart from other bleaching products is its unique bond-protecting technology. The name “Bondbar” isn’t just clever marketing; it actually refers to the product’s ability to protect and preserve the bonds in your hair during the bleaching process.
Most conventional bleaches focus solely on lifting color, often at the expense of your hair’s integrity. They break down not just the pigment, but also the disulfide bonds that give your hair its strength and elasticity. This is why bleached hair often feels dry, brittle, and damaged. Bondbar, however, contains ingredients that help minimize this damage by preserving these crucial bonds.
I remember my first time using Bondbar Bleach. After years of bleaching disasters that left my hair feeling like hay, I was astonished to run my fingers through hair that felt almost as soft as before the treatment. It was like discovering that unicorns exist after believing they were just myths!
The Complete Guide to Using Bondbar Bleach at Home
Before I dive into the nitty-gritty of using Bondbar Bleach, I want to emphasize the importance of preparation. When it comes to bleaching your hair at home, being well-prepared isn’t just recommended—it’s essential.
What You’ll Need:
- Bondbar Bleach powder
- Developer (I’ll discuss which volume to choose later)
- Mixing bowl (non-metallic)
- Application brush
- Gloves (the thin ones that come in hair dye boxes aren’t ideal; get thick ones)
- Old clothes or a salon cape
- Plastic shower cap or cling film
- Toner (for after bleaching)
- Clock or timer
- Sectioning clips
- Vaseline or barrier cream for your hairline
- Deep conditioning treatment for after
Step-by-Step Application Process:
- Preparation Phase I always start with unwashed hair—the natural oils help protect your scalp during the bleaching process. I learned this the hard way after bleaching freshly washed hair and feeling like my scalp was on fire! Section your hair into four parts: down the middle from forehead to nape, then across from ear to ear. Clip these sections separately. Apply Vaseline around your hairline, ears, and nape to protect your skin from the bleach.
- Mixing the Bleach In your non-metallic bowl, mix the Bondbar Bleach powder with the developer. The ratio is typically 1:2 (one part bleach to two parts developer), but always check the specific instructions on your packet. The mixture should have a smooth, yogurt-like consistency—not too runny and not too thick. I remember my first attempt at mixing bleach resulted in a lumpy, watery mess that dripped everywhere except where I wanted it. Take your time with this step; proper mixing ensures even application and results.
- Application Technique Starting at the back of your head (the hair at the nape processes slower due to less heat), apply the bleach mixture about half an inch away from your scalp. Work through each section methodically, ensuring every strand is saturated. Apply to your roots last, as they process faster due to the heat from your scalp. This was a game-changing tip I learned after ending up with bright white roots and yellow mid-lengths!
- Processing Time Cover your hair with a plastic shower cap or cling film to retain heat and help the bleach process. Now comes the waiting game. Bondbar Bleach typically processes in 20-45 minutes, but this varies based on your starting color, desired level of lift, and the developer strength. Never leave bleach on longer than recommended, even if you haven’t reached your desired lightness. Multiple gentle sessions are better than one damaging marathon. I check my hair every 5-10 minutes (by wiping a small section clean) to monitor the color lift.
- Rinsing and Aftercare Once you’ve reached your desired level of lightness (or the maximum processing time), rinse your hair thoroughly with cool water until the water runs clear. Follow with a gentle, sulfate-free shampoo and a deep conditioning treatment. I always follow bleaching with a protein treatment and then a moisture mask to help restore my hair’s balance and strength.
Is Bondbar Bleach Safe for All Hair Types?
This is perhaps one of the most common questions I receive from friends and followers who are considering bleaching their hair. The short answer is: it depends.
Bondbar Bleach is gentler than many traditional bleaches due to its bond-protecting technology, but bleach is still bleach. It’s a chemical process that alters your hair structure, and some hair types are more vulnerable to damage than others.
Fine Hair
If you have fine hair like my sister, you need to be extra cautious. Fine hair has less protein structure to begin with, so it can become damaged more easily. I always recommend using a lower volume developer (10 or 20) and monitoring the processing time very carefully.
Thick, Coarse Hair
On the other hand, if you have thick, coarse hair like mine, you might find that your hair is more resistant to bleach. It might require a stronger developer or longer processing time to achieve the same level of lift. However, this doesn’t mean you should push it to the limit!
Curly and Textured Hair
For curly, kinky, or highly textured hair, bleaching requires special care. These hair types are often naturally drier and more prone to breakage. The good news is that Bondbar Bleach’s bond-protecting formula makes it a better option than most traditional bleaches for these hair types.
My friend Jasmine, who has gorgeous 3C curls, swears by Bondbar Bleach for her highlights. She says it’s the only bleach that doesn’t completely destroy her curl pattern. However, she always follows it with an intensive moisture regimen.
Previously Processed Hair
If your hair has been colored, relaxed, permed, or otherwise chemically treated, proceed with extreme caution. Overlapping bleach on already bleached hair is a recipe for disaster—I learned this lesson when a chunk of my hair broke off during my early bleaching experiments!
The Damage Question: Does Bondbar Bleach Harm Your Hair?
Let’s be real here: all bleach causes some level of damage to your hair. Anyone who tells you otherwise is either misinformed or trying to sell you something.
The bleaching process works by opening the hair cuticle and breaking down melanin (color) molecules. This process also breaks some of the protein bonds that give hair its strength and elasticity. The result? Hair that’s more porous, potentially drier, and more prone to breakage.
What makes Bondbar Bleach different is not that it eliminates damage entirely, but that it significantly reduces the damage compared to traditional bleaches. The bond-protecting technology helps preserve some of the crucial disulfide bonds in your hair, resulting in less breakage and better post-bleach condition.
I’ve used various bleaches over the years, from box dyes to professional salon products, and I can honestly say that Bondbar has left my hair in the best condition. Is it exactly the same as virgin hair? No. But it’s not the dry, brittle mess I’ve experienced with other products.
To minimize damage when using Bondbar Bleach:
- Don’t bleach already damaged hair
- Use the lowest developer volume that will achieve your desired results
- Never exceed the recommended processing time
- Always follow with appropriate aftercare
- Allow recovery time between bleaching sessions
Breaking Down the Ingredients in Bondbar Bleach
When I first started my hair coloring journey, I paid little attention to ingredients. If it worked, great! But as I’ve become more conscious about what I put on my body, understanding what’s actually in these products has become important to me.
Bondbar Bleach contains several key ingredients:
Persulfates (Ammonium, Potassium, or Sodium Persulfate)
These are the active lightening agents that break down melanin. All bleaches contain some form of persulfate—it’s what makes bleach work.
Bond-Protecting Complex
This is Bondbar’s secret weapon. While the exact formula is proprietary, it typically contains ingredients like proteins, amino acids, and polymers that help minimize damage to the hair’s disulfide bonds during the bleaching process.
Kaolin or Other Clays
Many premium bleaches, including Bondbar, contain natural clays that help the product adhere better to the hair and provide a more controlled lift.
Conditioning Agents
Ingredients like silica, various oils, or plant extracts help condition the hair during the bleaching process, reducing dryness and damage.
Blue or Purple Pigments
These are added to counteract yellow and brassy tones during lifting. It’s what gives many bleach powders their distinctive blue or purple color.
What I appreciate about Bondbar Bleach is the absence of unnecessary fillers and the inclusion of conditioning agents. While it’s not “natural” (no effective hair bleach can be completely natural), it’s formulated with hair health in mind.
The Timing Question: How Long Should Bondbar Bleach Stay On?
One of the most common mistakes people make when bleaching at home is leaving the product on too long, thinking it will give better results. I made this error early in my bleaching journey and ended up with severely damaged hair that took months to recover.
With Bondbar Bleach, the recommended processing time is 20-45 minutes, depending on your hair type, starting color, and desired level of lift. However, never exceed the maximum time stated on the packaging, even if you haven’t reached your target shade.
Here’s my rule of thumb for processing times:
- Fine, pre-lightened, or fragile hair: 20-30 minutes maximum
- Virgin, healthy, medium-textured hair: 30-40 minutes
- Coarse, resistant, dark hair: 35-45 minutes
Remember that bleach works progressively—it doesn’t suddenly lift all at once at the end of the processing time. If you’re not seeing sufficient lift after the maximum time, it’s better to rinse it out, let your hair recover, and do another session later than to risk severe damage.
I always set a timer when bleaching and check my hair every 10 minutes to monitor the progress. Once you reach a pale yellow stage, you’ve typically extracted as much color as you safely can in one session. The rest is a job for toner, not more bleach!
Can Bondbar Bleach Effectively Lighten Dark Hair?
As someone who started with naturally dark brown hair, this question is close to my heart. Can Bondbar Bleach take you from brunette to blonde in one go? The honest answer is: it depends, but usually not.
Dark hair contains more melanin, which means more pigment to break down. Going from dark brown or black to light blonde typically requires multiple bleaching sessions with recovery time in between. Attempting to go from dark to platinum in one session is the fastest way to severely damage your hair.
That said, Bondbar Bleach does lift dark hair more effectively than many other products I’ve tried. Its formula seems to penetrate the hair shaft more efficiently, providing more lift with less damage. But there are still limitations to what chemistry can safely achieve.
Here’s what you can realistically expect:
- Dark brown to light brown/dark blonde in one session
- Each subsequent session can lift 2-3 levels, with proper recovery time between
- Black hair might require a color remover before bleaching for best results
My journey from dark brown to platinum took four sessions spread over six months. It wasn’t an overnight transformation, but the gradual approach preserved my hair’s health.
Preparation Makes Perfect: Mixing Bondbar Bleach
The way you prepare your bleach mixture can make a huge difference in your results. I’ve had bleaching sessions go wrong simply because I didn’t mix the product correctly!
The Perfect Mixing Ratio
Bondbar Bleach typically uses a 1:2 ratio of bleach powder to developer. This means for 1 scoop (approximately 30g) of Bondbar Bleach powder, you’ll need 60ml of developer.
The consistency should be smooth and creamy, similar to yogurt—not so thick that it’s difficult to spread, and not so runny that it drips everywhere. If your mixture is too thick, add a little more developer. If it’s too thin, add a bit more bleach powder.
Choosing the Right Developer
The developer (also called peroxide) comes in different strengths, measured in volumes:
- 10 volume (3%): Provides minimal lift, good for sensitive scalps or compromised hair
- 20 volume (6%): The most commonly used, provides moderate lift with moderate damage
- 30 volume (9%): Stronger lift, but more damaging
- 40 volume (12%): Very strong lift, but highest risk of damage
I personally never go above 30 volume, even for my resistant hair. The extra lift from 40 volume isn’t worth the potential damage, in my experience. Most of the time, I use 20 volume and just accept that I might need an additional session to reach my target shade.
Mixing Tools
Always use plastic or silicone tools for mixing bleach—never metal, as it can react with the bleach and affect the results. I use a dedicated plastic bowl and silicone spatula that I keep just for hair coloring.
Mix thoroughly until you have no lumps. Unmixed powder can cause uneven results and potentially more damage to certain sections of hair.
Is Bondbar Bleach Suitable for Sensitive Scalps?
If you have a sensitive scalp like me, you might be hesitant about using any bleach. The burning, itching sensation that can come with bleaching isn’t just uncomfortable—it can indicate irritation or chemical burns.
Bondbar Bleach is formulated to be gentler on the scalp than many traditional bleaches. It contains fewer harsh irritants and more soothing ingredients. However, it still contains persulfates, which are the main cause of scalp irritation during bleaching.
Here’s my approach for bleaching with a sensitive scalp:
- Don’t wash your hair for 2-3 days before bleaching (natural oils protect your scalp)
- Do a patch test 48 hours before full application
- Apply a thick layer of Vaseline around your hairline and on your ears
- Consider using 10 volume developer instead of 20 for on-scalp applications
- Never apply directly to the scalp—keep the bleach on the hair
- If you feel excessive burning or irritation, rinse immediately
I’ve found that Bondbar Bleach causes me less irritation than other bleaches I’ve used. However, if you have extremely sensitive skin or have had allergic reactions to hair color in the past, consider highlighting or foil techniques that keep the bleach off your scalp entirely.
The Price Factor: Is Bondbar Bleach Worth the Investment?
Let’s talk about the elephant in the room: Bondbar Bleach isn’t the cheapest option on the market. When I first saw the price tag, I hesitated. Was it really worth paying nearly triple what I’d spend on a box bleach from the drugstore?
After using it multiple times, my answer is a resounding yes. Here’s why:
Cost Breakdown
A typical 500g tub of Bondbar Bleach costs between $30-45, depending on where you purchase it. This can seem expensive compared to box bleaches that run around $10-15. However, that 500g tub contains enough product for multiple applications, depending on your hair length and thickness.
For my shoulder-length, medium-thick hair, I get about 4-5 full applications from a tub. That breaks down to approximately $8-9 per session, which is comparable to budget options when you factor in that you’ll also need to purchase developer separately.
The Hidden Savings
The real value becomes apparent when you consider the hidden costs of using inferior bleach:
- Less damage means fewer deep conditioning treatments and repair products
- Better results mean less corrective coloring (which can be extremely expensive)
- Healthier hair means less trimming and cutting to remove damaged ends
Before discovering Bondbar, I once spent $200 on an emergency salon visit to fix a botched bleach job from a $12 box dye. That single correction cost more than several tubs of Bondbar Bleach!
When you factor in these considerations, Bondbar Bleach is actually quite economical in the long run, especially if you regularly lighten your hair.
Where to Buy Authentic Bondbar Bleach
One challenge with popular professional products is the prevalence of counterfeits or expired products. I learned this lesson when I purchased what I thought was Bondbar Bleach from an online marketplace, only to discover it was a knockoff that damaged my hair.
Reliable Retailers
For authentic Bondbar Bleach, I recommend purchasing from:
- Licensed beauty supply stores (both brick-and-mortar and online)
- The official Bondbar website or authorized online retailers
- Professional salons that carry the brand
Be wary of deals that seem too good to be true on general marketplaces or auction sites. Professional hair products are frequently counterfeited, and the knockoffs can contain harmful ingredients.
How to Spot Counterfeits
Check for these red flags:
- Significantly lower price than other retailers
- Packaging discrepancies (fuzzy logos, misspellings, different font)
- Missing batch numbers or manufacturing dates
- Different texture, smell, or color than previous purchases
- Seller with poor reviews or limited history
I now only purchase from authorized retailers, even if it means paying a bit more. The peace of mind knowing I’m using a safe, effective product is worth it.
Bondbar Bleach vs. The Competition: How Does It Compare?
I’ve tried numerous bleach products over the years, from drugstore box kits to high-end salon products. Here’s how Bondbar Bleach compares to other popular options:
Bondbar vs. Box Bleach Kits
Box kits (like those from Schwarzkopf, L’Oreal, or Revlon) typically come with everything you need: bleach, developer, gloves, and sometimes a toner or conditioner. They’re convenient and inexpensive, but they have significant drawbacks:
- The developer is usually 30 or 40 volume—too harsh for many people
- They contain fewer conditioning agents
- The bleach powder is often less effective at lifting
- They don’t contain bond-protecting technology
Bondbar Bleach lifts more effectively and causes noticeably less damage than any box kit I’ve tried. The difference is particularly apparent in how my hair feels after bleaching—soft and manageable rather than straw-like and brittle.
Bondbar vs. Other Professional Bleaches
Compared to other professional bleaches like Wella Blondor, Schwarzkopf Blondme, or Matrix Light Master:
- Bondbar lifts about as well as other professional bleaches
- It causes less damage than most (though BlondMe is also excellent in this regard)
- The price point is in the middle range for professional products
- The dust-free formula creates less irritating airborne particles than some competitors
The main advantage Bondbar has over most professional bleaches is its built-in bond protection. With many other bleaches, you need to purchase a separate bond-protecting additive, which adds to the cost and complication.
Bondbar vs. Olaplex-Compatible Bleaches
Some brands now offer bleaches designed to work with Olaplex or similar bond-multiplying additives. These can be excellent when used correctly, but they require purchasing the additive separately and mixing it precisely.
I find Bondbar more convenient because the bond protection is built right in. No measuring tiny amounts of liquid or worrying about whether I’ve added enough to protect my hair. The all-in-one approach gives me peace of mind.
Using Bondbar Bleach on Previously Colored Hair: Proceed with Caution
One of the most frequent questions I get is whether Bondbar Bleach can be used on hair that’s already been colored. The answer is: it depends on the type of color.
Bleaching Over Permanent Dye
Lifting permanent hair color with bleach is tricky and potentially damaging. When I tried to bleach over a dark brown box dye years ago, the results were disastrous—orange, uneven color and severely damaged ends.
If your hair has permanent color (especially darker shades), I recommend:
- Using a color remover designed for permanent dye first
- Giving your hair at least two weeks to recover
- Starting with a strand test before full application of Bondbar Bleach
- Using a lower volume developer (10 or 20 volume)
- Being prepared for potentially uneven results
Bleaching Over Semi-Permanent or Demi-Permanent Color
These types of color are easier to lift with bleach, but they can still create unpredictable results. I’ve had the most success using a clarifying shampoo multiple times to fade the color before attempting to bleach.
Bleaching Already-Bleached Hair
This is where extreme caution is needed. Never apply bleach directly over already-bleached portions of your hair. The overlapping can cause severe breakage or even complete hair loss in those areas.
When I’m touching up my roots, I apply Bondbar Bleach only to the new growth, being meticulously careful not to overlap with previously bleached sections. If I need to refresh my lengths, I use a gentler approach like a bleach bath (diluted bleach mixed with shampoo) for just a few minutes.
The Perfect Finish: Toning After Bondbar Bleach
Bleach typically leaves hair with some level of yellow or orange tones. This is normal and expected—bleach simply removes pigment, it doesn’t add the cool tones that many people desire in blonde hair.
This is where toning comes in. I consider toning an essential second step after using Bondbar Bleach, not an optional extra.
Choosing the Right Toner
The toner you need depends on what unwanted tones are present in your hair after bleaching:
- For yellow tones: Use a purple-based toner
- For orange tones: Use a blue-based toner
- For yellow-orange (brassy) tones: Use a blue-violet toner
My favorite toners to use after Bondbar Bleach include:
- Wella Color Charm T18 for pale yellow hair that I want to make platinum
- Redken Shades EQ in 9V or 9P for a more natural, slightly warmer blonde
- Purple shampoo for maintenance between full toning sessions
Toning Process
I always wait at least 24 hours after bleaching before toning. This gives my hair time to recover and the porosity to normalize somewhat, resulting in more even toner absorption.
Toners typically process for 5-30 minutes, depending on the product and desired result. I check frequently, as over-toning can result in gray or purple-tinged hair (though this usually washes out).
Remember that toner is not permanent—it fades with washing. I maintain my toned color with purple shampoo used 1-2 times per week and re-tone completely about once a month.
Real Results: Bondbar Bleach on Black Hair
If you have black hair—whether natural or dyed—you’re probably wondering if Bondbar Bleach can work for you. This is a question I get often from my friends with darker hair colors.
Based on my experience and the results I’ve seen on friends, Bondbar Bleach can effectively lift black hair, but with important caveats:
- Natural black hair will likely require multiple sessions to reach blonde
- Dyed black hair may need color remover before bleaching
- The first session often results in orange or red tones, which is normal
My friend Mei has natural black Asian hair and used Bondbar Bleach to create a beautiful balayage effect. Her process involved:
- First session: Lifted to a coppery orange
- Second session (4 weeks later): Reached a gold-yellow
- Toning with a blue-violet toner to neutralize remaining warmth
The key was patience and proper hair care between sessions. Mei used protein treatments and deep conditioning masks twice weekly during the transition process.
The results were stunning—multidimensional blonde ends with her natural black at the roots, and her hair remained strong and healthy throughout the process.
Potential Side Effects and Risks of Using Bondbar Bleach
Being transparent about potential risks is important to me. While Bondbar Bleach is gentler than many alternatives, it’s still a chemical process that comes with possible side effects:
Scalp Irritation and Chemical Burns
The persulfates in bleach can cause irritation, redness, or even chemical burns on sensitive skin. To minimize this risk:
- Always do a patch test
- Don’t apply directly to the scalp
- Never use on irritated or broken skin
- Rinse immediately if you experience burning or severe discomfort
Hair Damage and Breakage
Even with bond-protecting technology, bleach can cause:
- Increased porosity (hair that absorbs water quickly but doesn’t retain moisture)
- Reduced elasticity (hair that breaks rather than stretches when pulled)
- Split ends and mid-shaft breakage
- Changed texture (especially in curly hair, which may loosen in pattern)
Allergic Reactions
Some people may experience allergic reactions to ingredients in hair bleach. Symptoms can include:
- Swelling of the face, neck, or scalp
- Hives or rash
- Difficulty breathing
- Dizziness
If you experience these symptoms, rinse the bleach out immediately and seek medical attention.
I’ve personally never had a severe reaction to Bondbar Bleach, but I always take precautions and recommend others do the same.
Can I Use Bondbar Bleach Without Developer?
I sometimes see this question in hair forums, and the answer is a definitive no. Bleach powder and developer work together in a chemical reaction that lifts the color from your hair. Without developer, bleach powder is inactive and won’t lighten your hair at all.
The developer (hydrogen peroxide) opens the hair cuticle and activates the persulfates in the bleach powder, allowing them to dissolve the melanin in your hair. Neither component works effectively on its own.
Some people confuse this question with whether they can use a different brand of developer with Bondbar Bleach—which you can. I sometimes use Wella or Salon Care developers with my Bondbar Bleach without issues. Just maintain the correct mixing ratio.
Post-Bleach Hair Care: Nursing Your Hair Back to Health
After using Bondbar Bleach, proper aftercare is crucial to maintain hair health. I’ve refined my post-bleach routine over years of trial and error:
Immediate Aftercare (First 48 Hours)
- Gentle Rinsing: Rinse with cool water until it runs clear, then shampoo with a sulfate-free, pH-balanced shampoo.
- Protein Treatment: I apply a protein treatment immediately after bleaching to help rebuild the hair structure. My favorite is Aphogee Two-Step Protein Treatment or Olaplex No. 3.
- Deep Conditioning: After the protein treatment, I follow with a moisturizing deep conditioner to restore softness.
- No Heat Styling: I avoid all heat tools for at least 48 hours after bleaching.
Ongoing Maintenance
- Weekly Treatments: I alternate between protein and moisture treatments weekly to maintain the strength-moisture balance.
- Limited Washing: I wash my hair a maximum of 2-3 times per week using sulfate-free products.
- Heat Protection: When I do use heat tools, I always apply a heat protectant and keep temperatures under 350°F.
- Silk Pillowcase: This reduces friction and helps prevent breakage while I sleep.
- Regular Trims: I get my ends trimmed every 6-8 weeks to prevent split ends from traveling up the hair shaft.
Following this regimen has allowed me to maintain bleached hair that still feels healthy and looks shiny. The bond-protecting technology in Bondbar Bleach gives me a head start, but consistent aftercare is what maintains the results.
Choosing the Right Developer Volume for Bondbar Bleach
The volume of developer you use with Bondbar Bleach significantly impacts both your results and the health of your hair. Here’s my guide to choosing the right strength:
10 Volume (3%)
- Lifts 1-2 levels
- Best for: sensitive scalps, damaged hair, toning, or very subtle lightening
- Processing time: 20-30 minutes
- My experience: I use this for refreshing already-blonde hair or for delicate areas like face-framing pieces
20 Volume (6%)
- Lifts 2-3 levels
- Best for: most general bleaching purposes, healthier hair, root touch-ups
- Processing time: 30-40 minutes
- My experience: This is my go-to for most applications—effective but not excessively damaging
30 Volume (9%)
- Lifts 3-4 levels
- Best for: resistant hair, darker natural colors
- Processing time: 35-45 minutes
- My experience: I use this sparingly and only on virgin hair that’s particularly resistant to lightening
40 Volume (12%)
- Lifts 4-5 levels
- Best for: extremely resistant hair
- Processing time: 30-45 minutes (monitor closely)
- My experience: I avoid this strength entirely as I find the damage isn’t worth the extra lift. If I need more lightening, I prefer doing a second session with 20 or 30 volume after my hair has recovered
A lower volume developer used in multiple sessions will almost always give healthier results than a single session with high-volume developer. I learned this the hard way after trying to speed up the process with 40 volume and ending up with significantly damaged hair.
Before and After: Real Results with Bondbar Bleach
Having used Bondbar Bleach for over two years now, I’ve accumulated quite a collection of before-and-after photos documenting my hair’s journey. While I can’t share them all here, I can describe some of the transformations I’ve achieved and observed in friends who’ve used my recommended product.
My Personal Results
Starting with medium brown hair with some previous highlights, my first Bondbar Bleach session lifted me to a warm golden blonde. After toning, I had a beautiful honey blonde that looked surprisingly healthy.
After a few months of proper care and another session focusing just on my roots, I achieved the bright, creamy blonde I’d always wanted without the severe damage I’d experienced with other bleaches.
The most remarkable difference was in how my hair felt—still soft and manageable, not the stiff, straw-like texture I was accustomed to after bleaching.
Friend Transformations
My roommate Sophia went from box-dyed black to a gorgeous silver-blonde over a period of four months using Bondbar Bleach. The gradual process preserved her hair’s integrity, and she received countless compliments on both the color and the condition of her hair.
Another friend with natural red hair achieved a stunning strawberry blonde in just one session, enhancing her natural color without completely changing it—a subtle transformation that looked completely natural.
Final Thoughts: Is Bondbar Bleach Right for You?
After this deep dive into Bondbar Bleach, you might be wondering if it’s the right choice for your hair lightening journey. Based on my extensive experience, I believe it’s an excellent option for most people, but there are a few considerations to keep in mind.
Bondbar Bleach might be perfect for you if:
- You want a professional-quality result at home
- You’re concerned about minimizing damage
- You’re willing to invest slightly more for better results
- You understand the realistic expectations for your hair type
- You’re committed to proper hair care before and after bleaching
You might want to consider alternatives if:
- You have severely damaged hair (consider professional help)
- You’re extremely sensitive to bleach ingredients
- You’re looking for the absolute cheapest option (though consider the hidden costs)
- You need immediate results (remember that safe lightening takes time)
For most people looking to lighten their hair at home, I genuinely believe Bondbar Bleach offers the best balance of effectiveness, hair health, and value. It’s been a game-changer in my personal hair color journey, allowing me to achieve and maintain the blonde I’ve always wanted without sacrificing the health and shine of my hair.
Remember that successful hair lightening is a marathon, not a sprint. Patience and proper technique are just as important as the products you choose. With Bondbar Bleach, good preparation, and diligent aftercare, you can achieve beautiful, healthy blonde hair that turns heads for all the right reasons.
Whether you’re a bleaching newbie or a seasoned color enthusiast, I hope this guide helps you navigate your journey to lighter, brighter hair with confidence and success. Here’s to happy bleaching!